How to Use Mushroom Anvils

simple dishes in a split second
This September, we are releasing a limited batch of our Mushroom Anvils! We’re making some tweaks to the design and production process for these tools and will have them back in stock permanently at the end of 2021.
For now, we hope you can grab one or two in our original design before they sell out.
Check out our step-by-step of how we love to use these beautiful tools below:

You’ll need:
- A wedged hunk of clay
- A rolling pin
- Our Compass Tool (or any circle cutters you have)
- Two needle tools (if using the Compass)
- Foam
- Mushroom Anvils
To use the Anvils without using foam, grab a cup and scroll the Alternative Shaping section of this tutorial.

step 1:
Roll your clay into a slab around 1/4” thick.
We typically set two long tools on either side of our clay and let our pin rest on them - this provides a gauge to roll the clay into an even thickness.

step 2:
Cut a circle one inch larger than the size of Mushroom Anvil you are using.
For example, we are using a 6” anvil so we cut a 7” circle. This helps provide enough clay to fully cover the curve of the anvil.

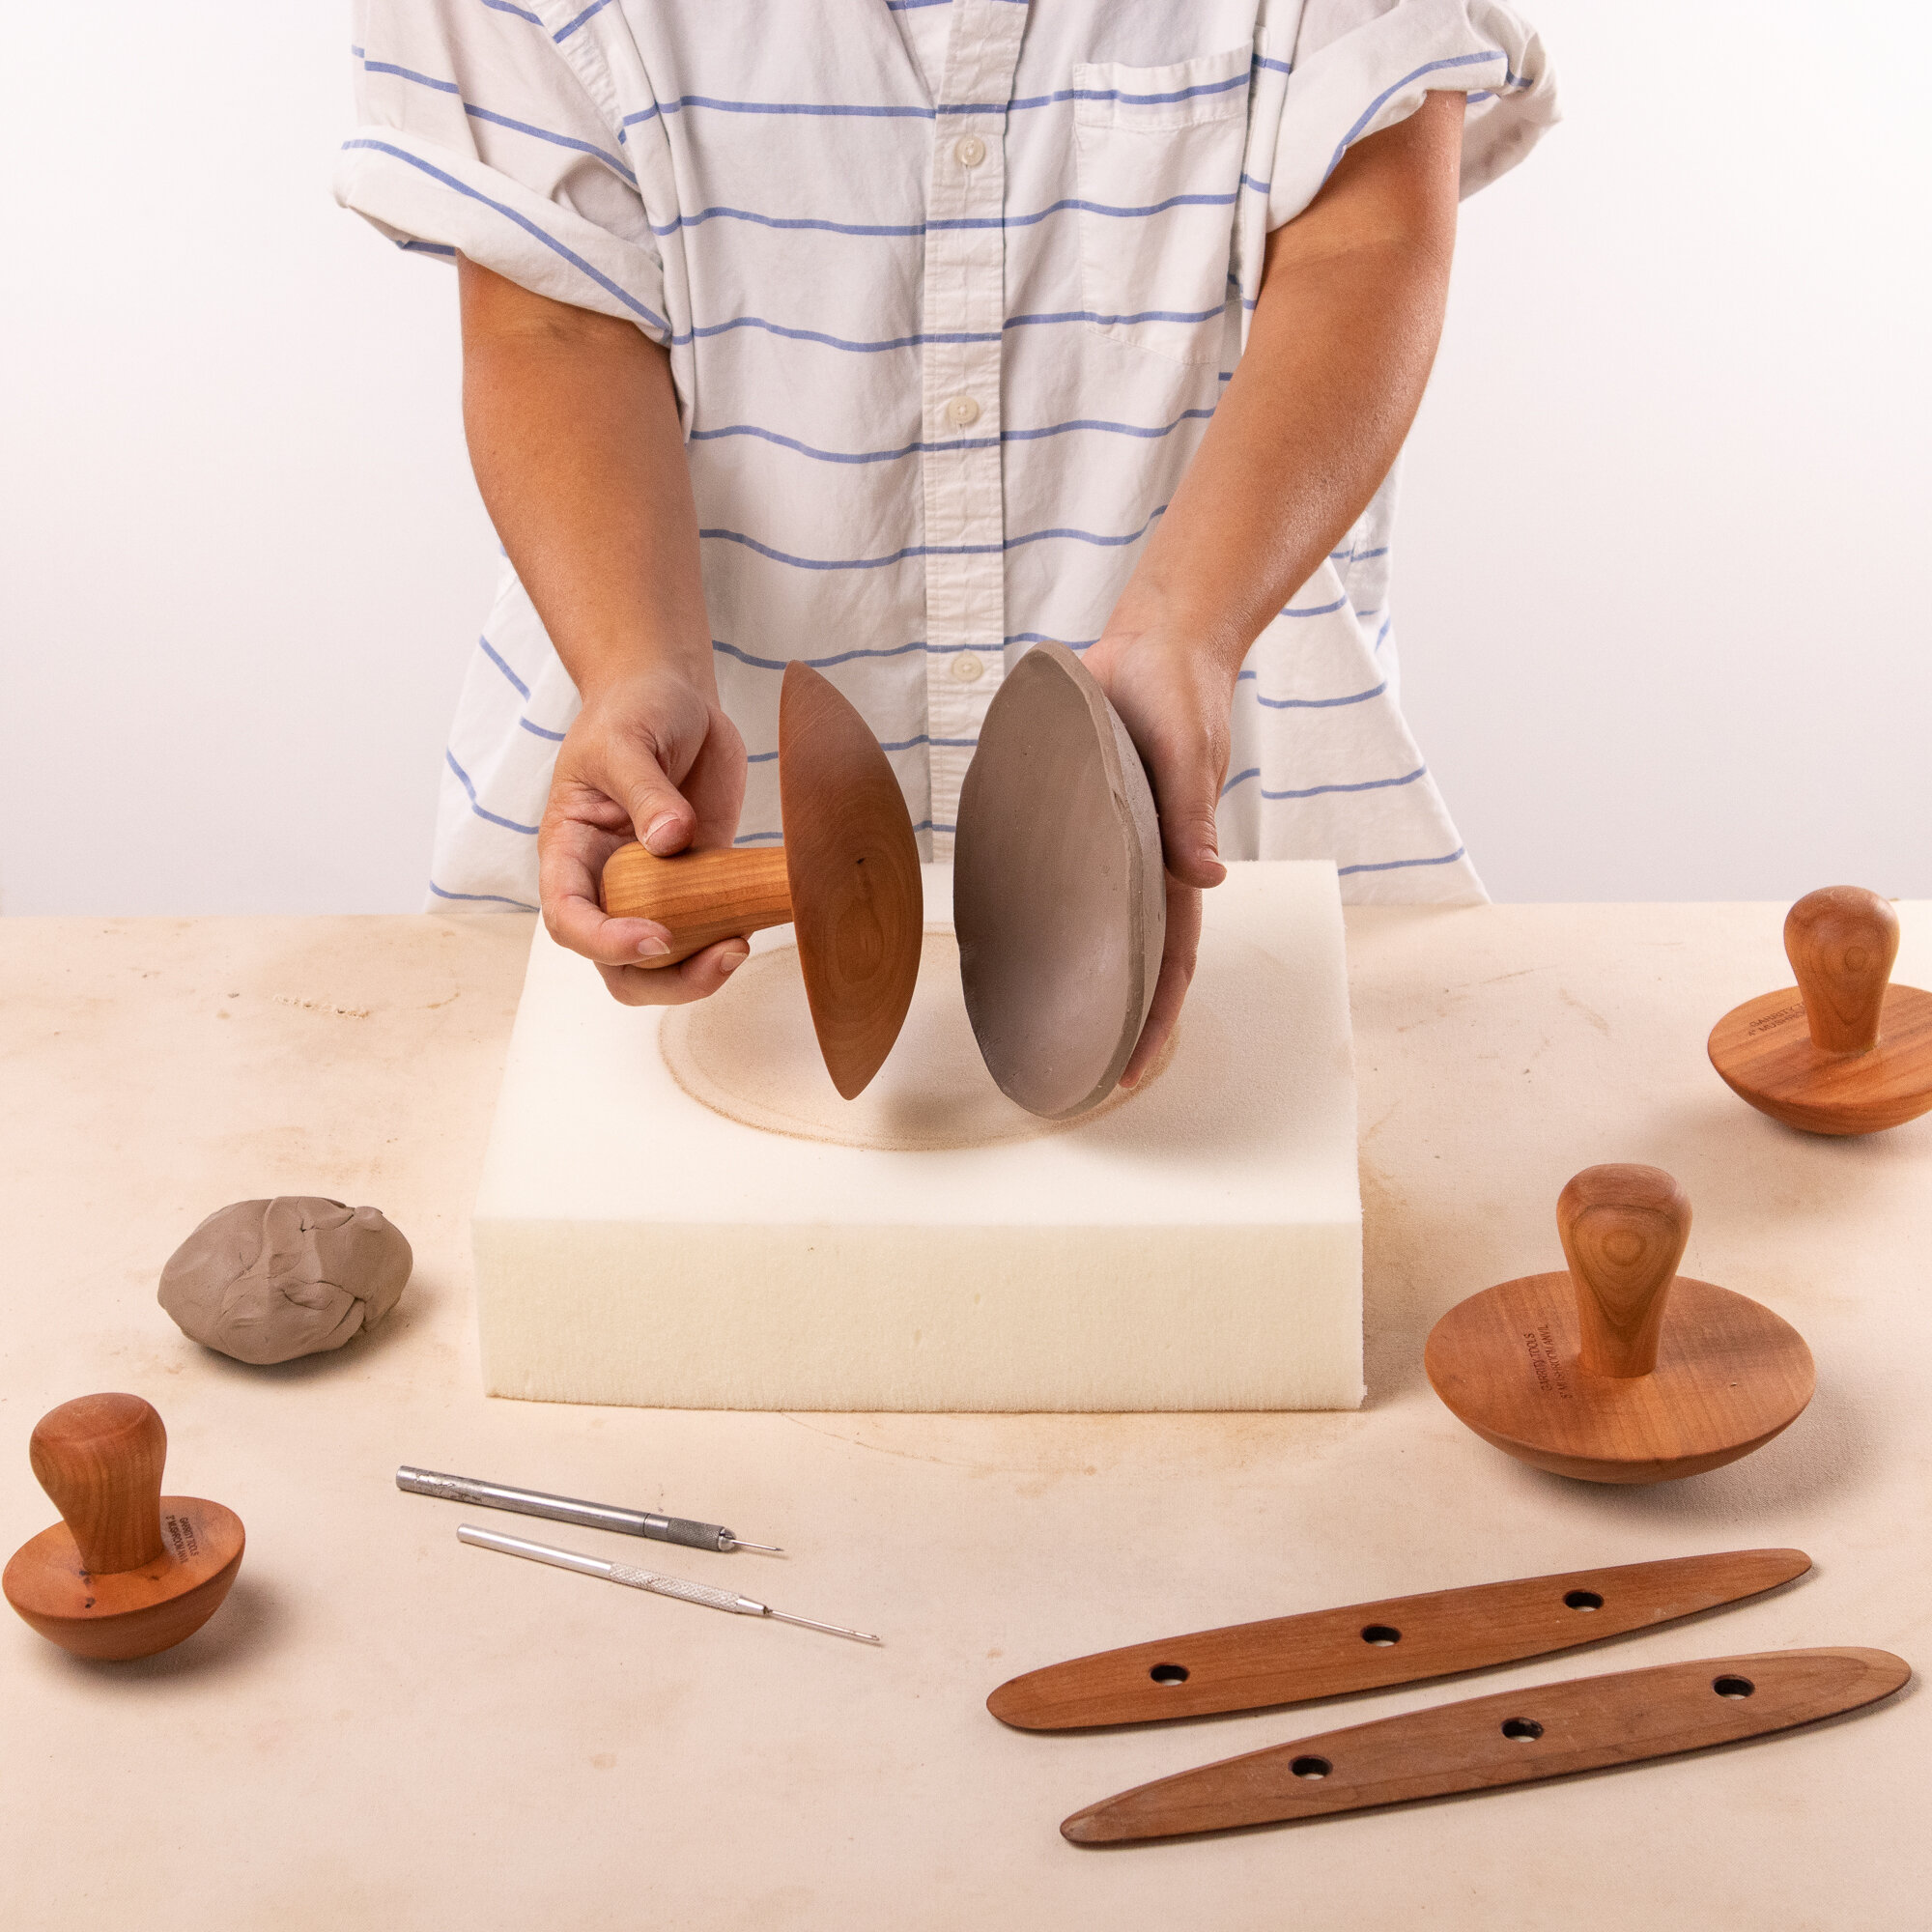
step 3:
Let your circle of clay dry enough that is almost leather hard. Then, place the clay on your foam.

step 4:
Center your anvil in the circle.

step 5:
Press the anvil into the clay and rock the tool back and forth and round and round to make sure the clay fully surrounds the anvil and takes the form of the tool.
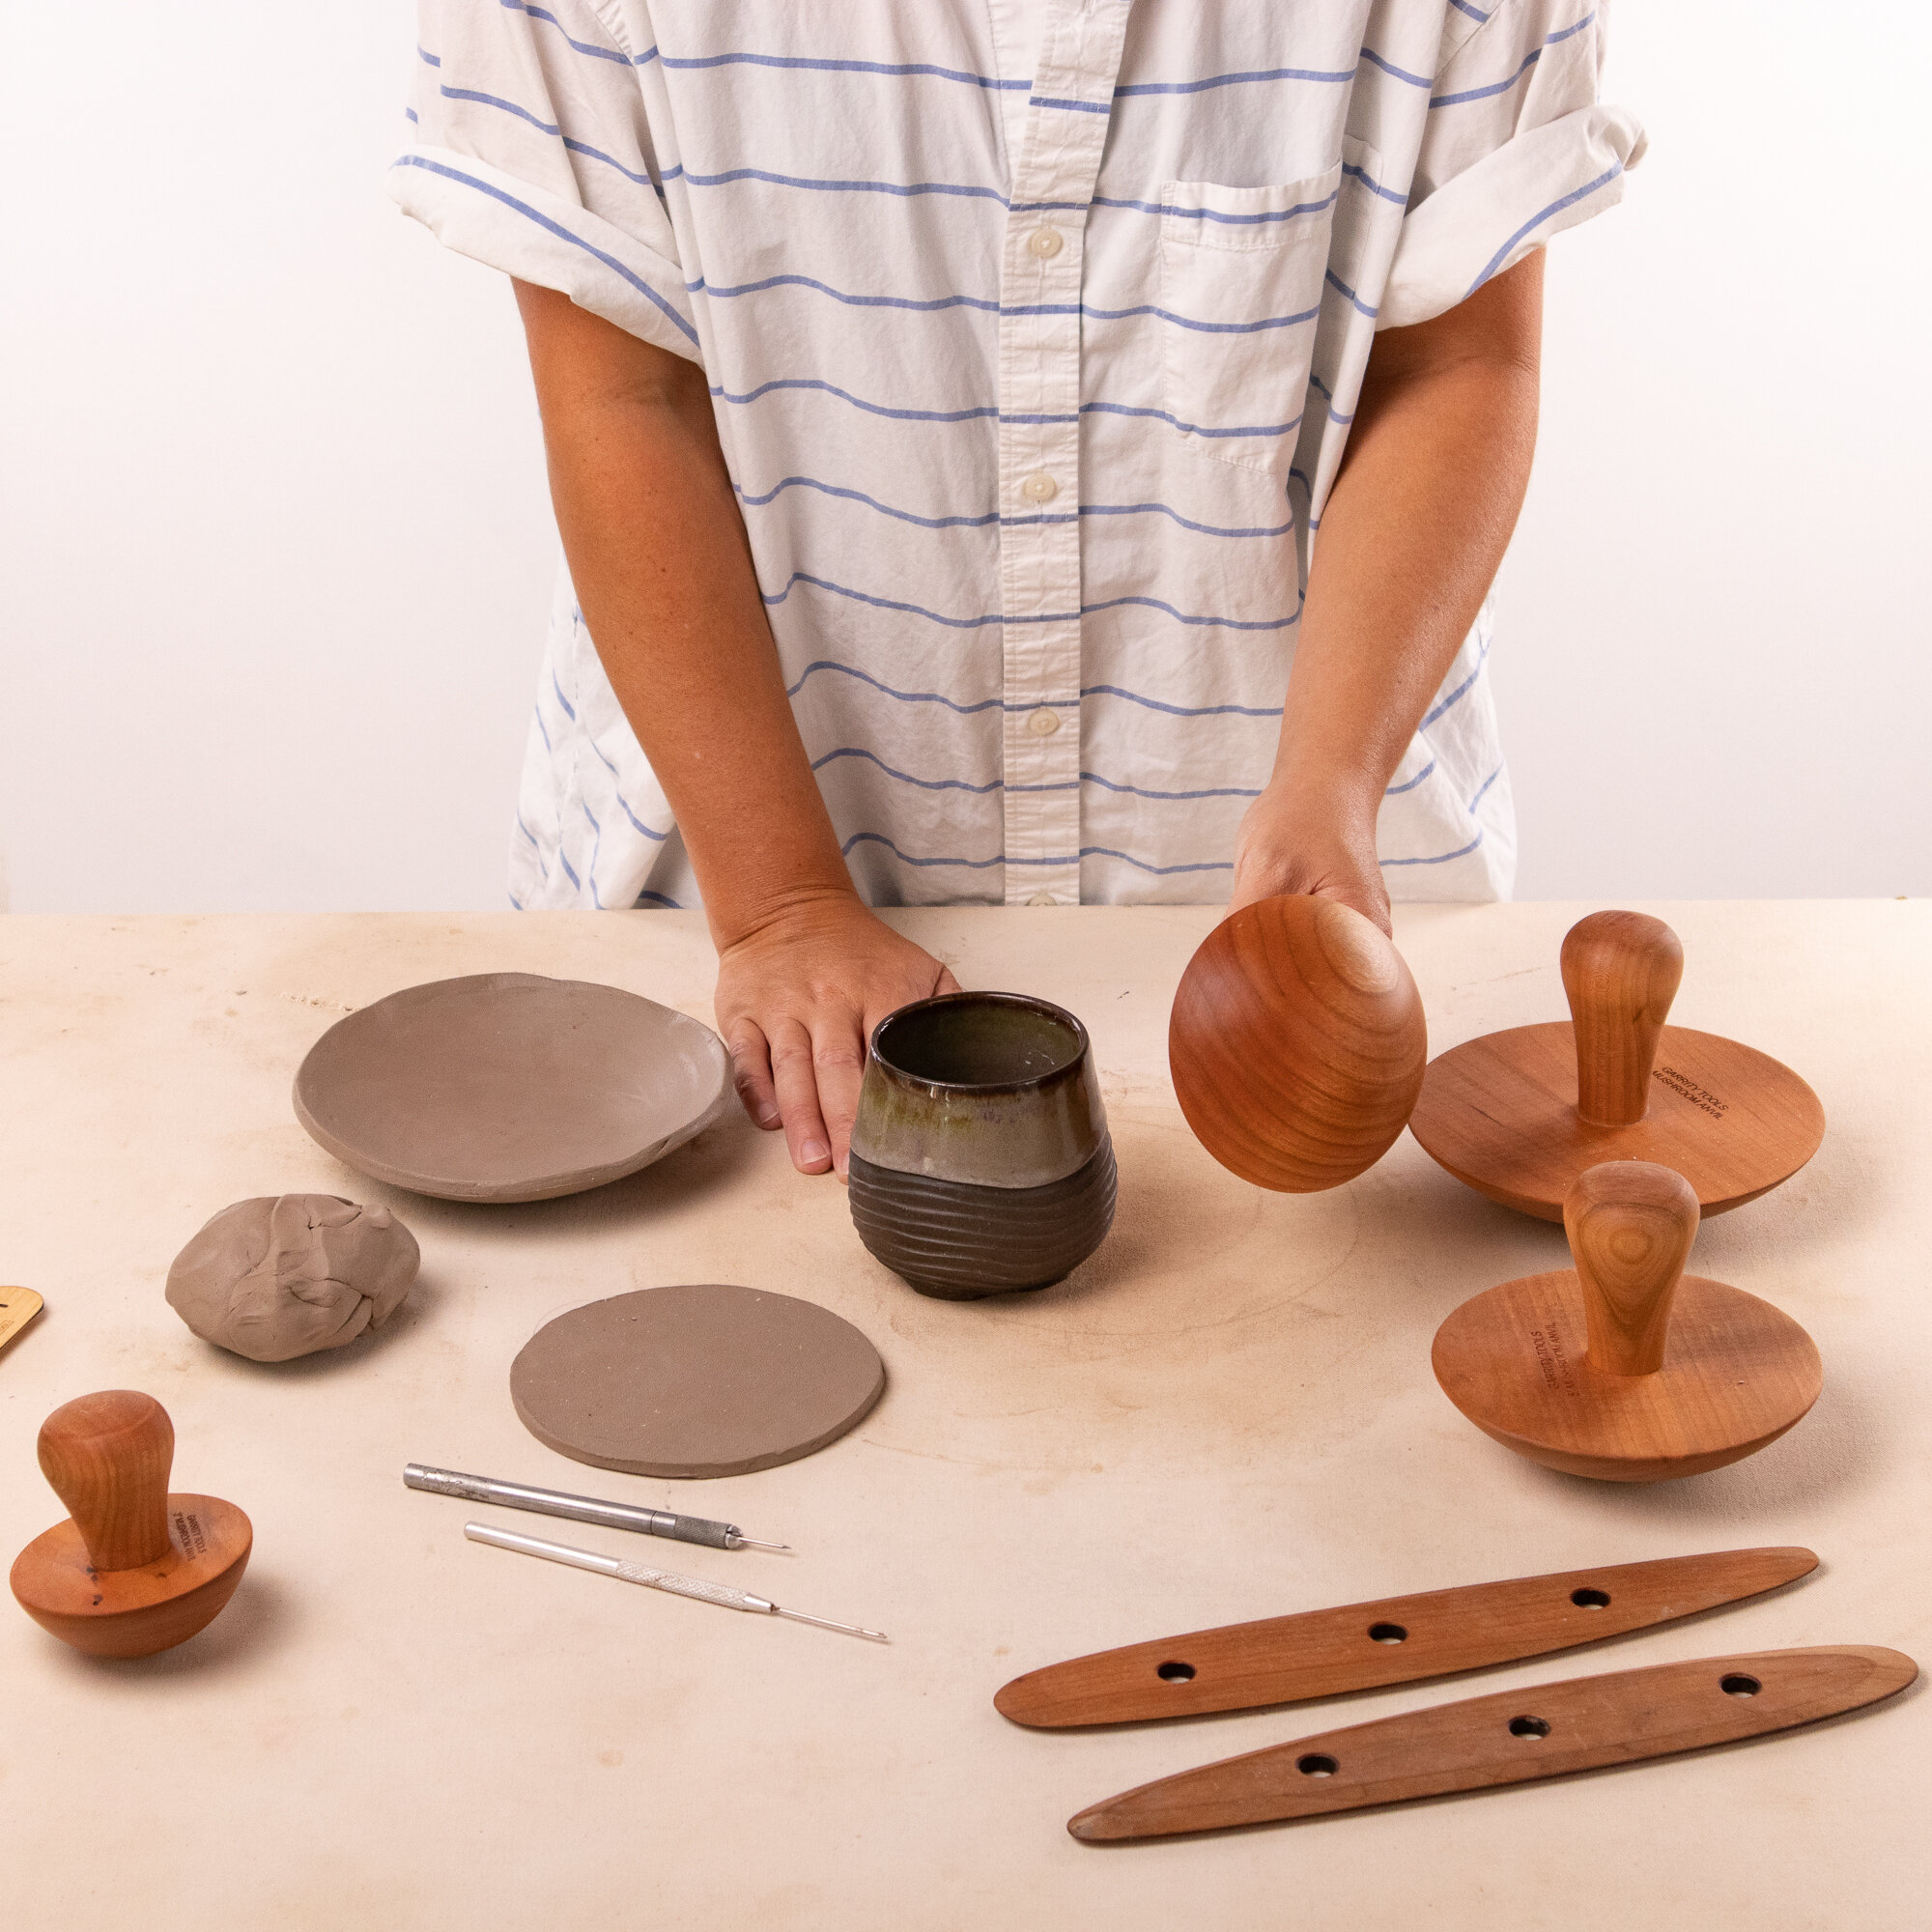
step 6:
Gently remove the clay from the anvil by tugging at the edges until the clay releases.
alternative shaping
step 1:
Grab a short cup or bowl with a rim that is smaller than the anvil top.

step 2:
Place your anvil with the handle side down into the cup.

step 3:
Lay your circle of almost-leather-hard clay over the anvil top. You can use a rib to smooth, shape, or add texture to the outside surface.
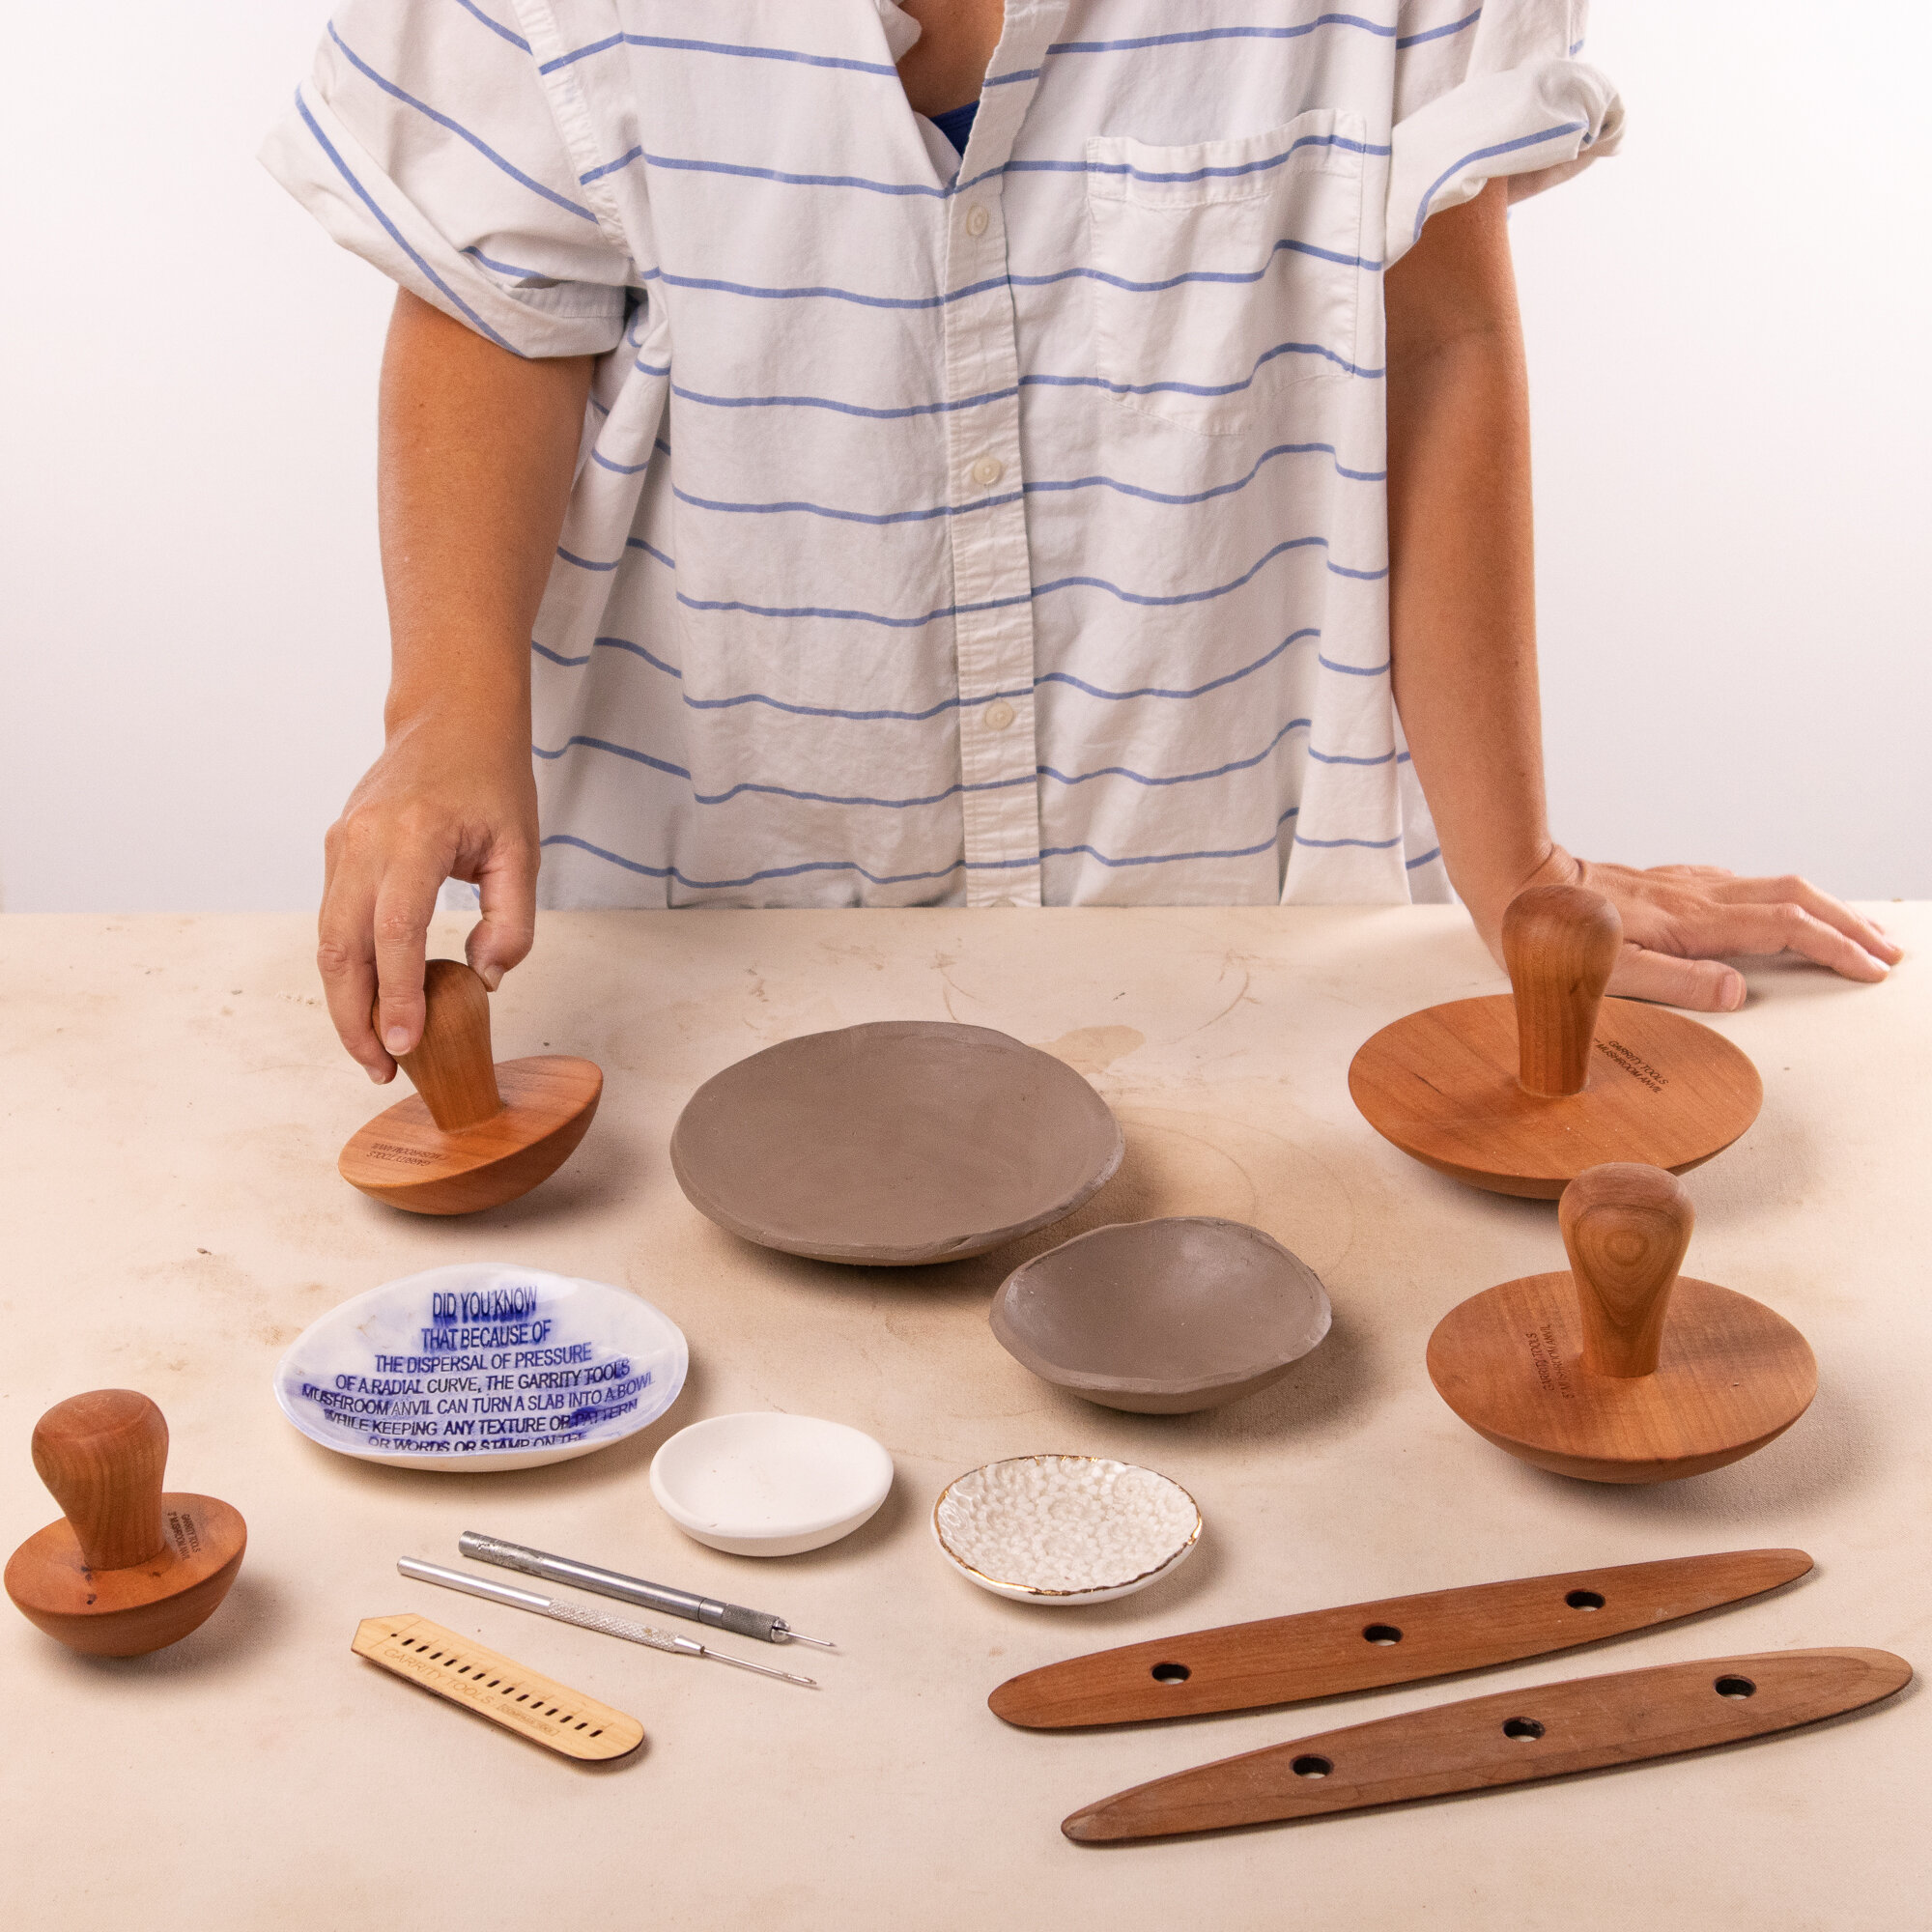
dishes complete!
Using our anvils you can make a variety of simple dishes super quick. You can also add texture and pattern to your slab before shaping it and the design will remain intact even after you press the anvil into it!