Using Texture Tools on the Wheel

adding texture with a few pulls of your clay
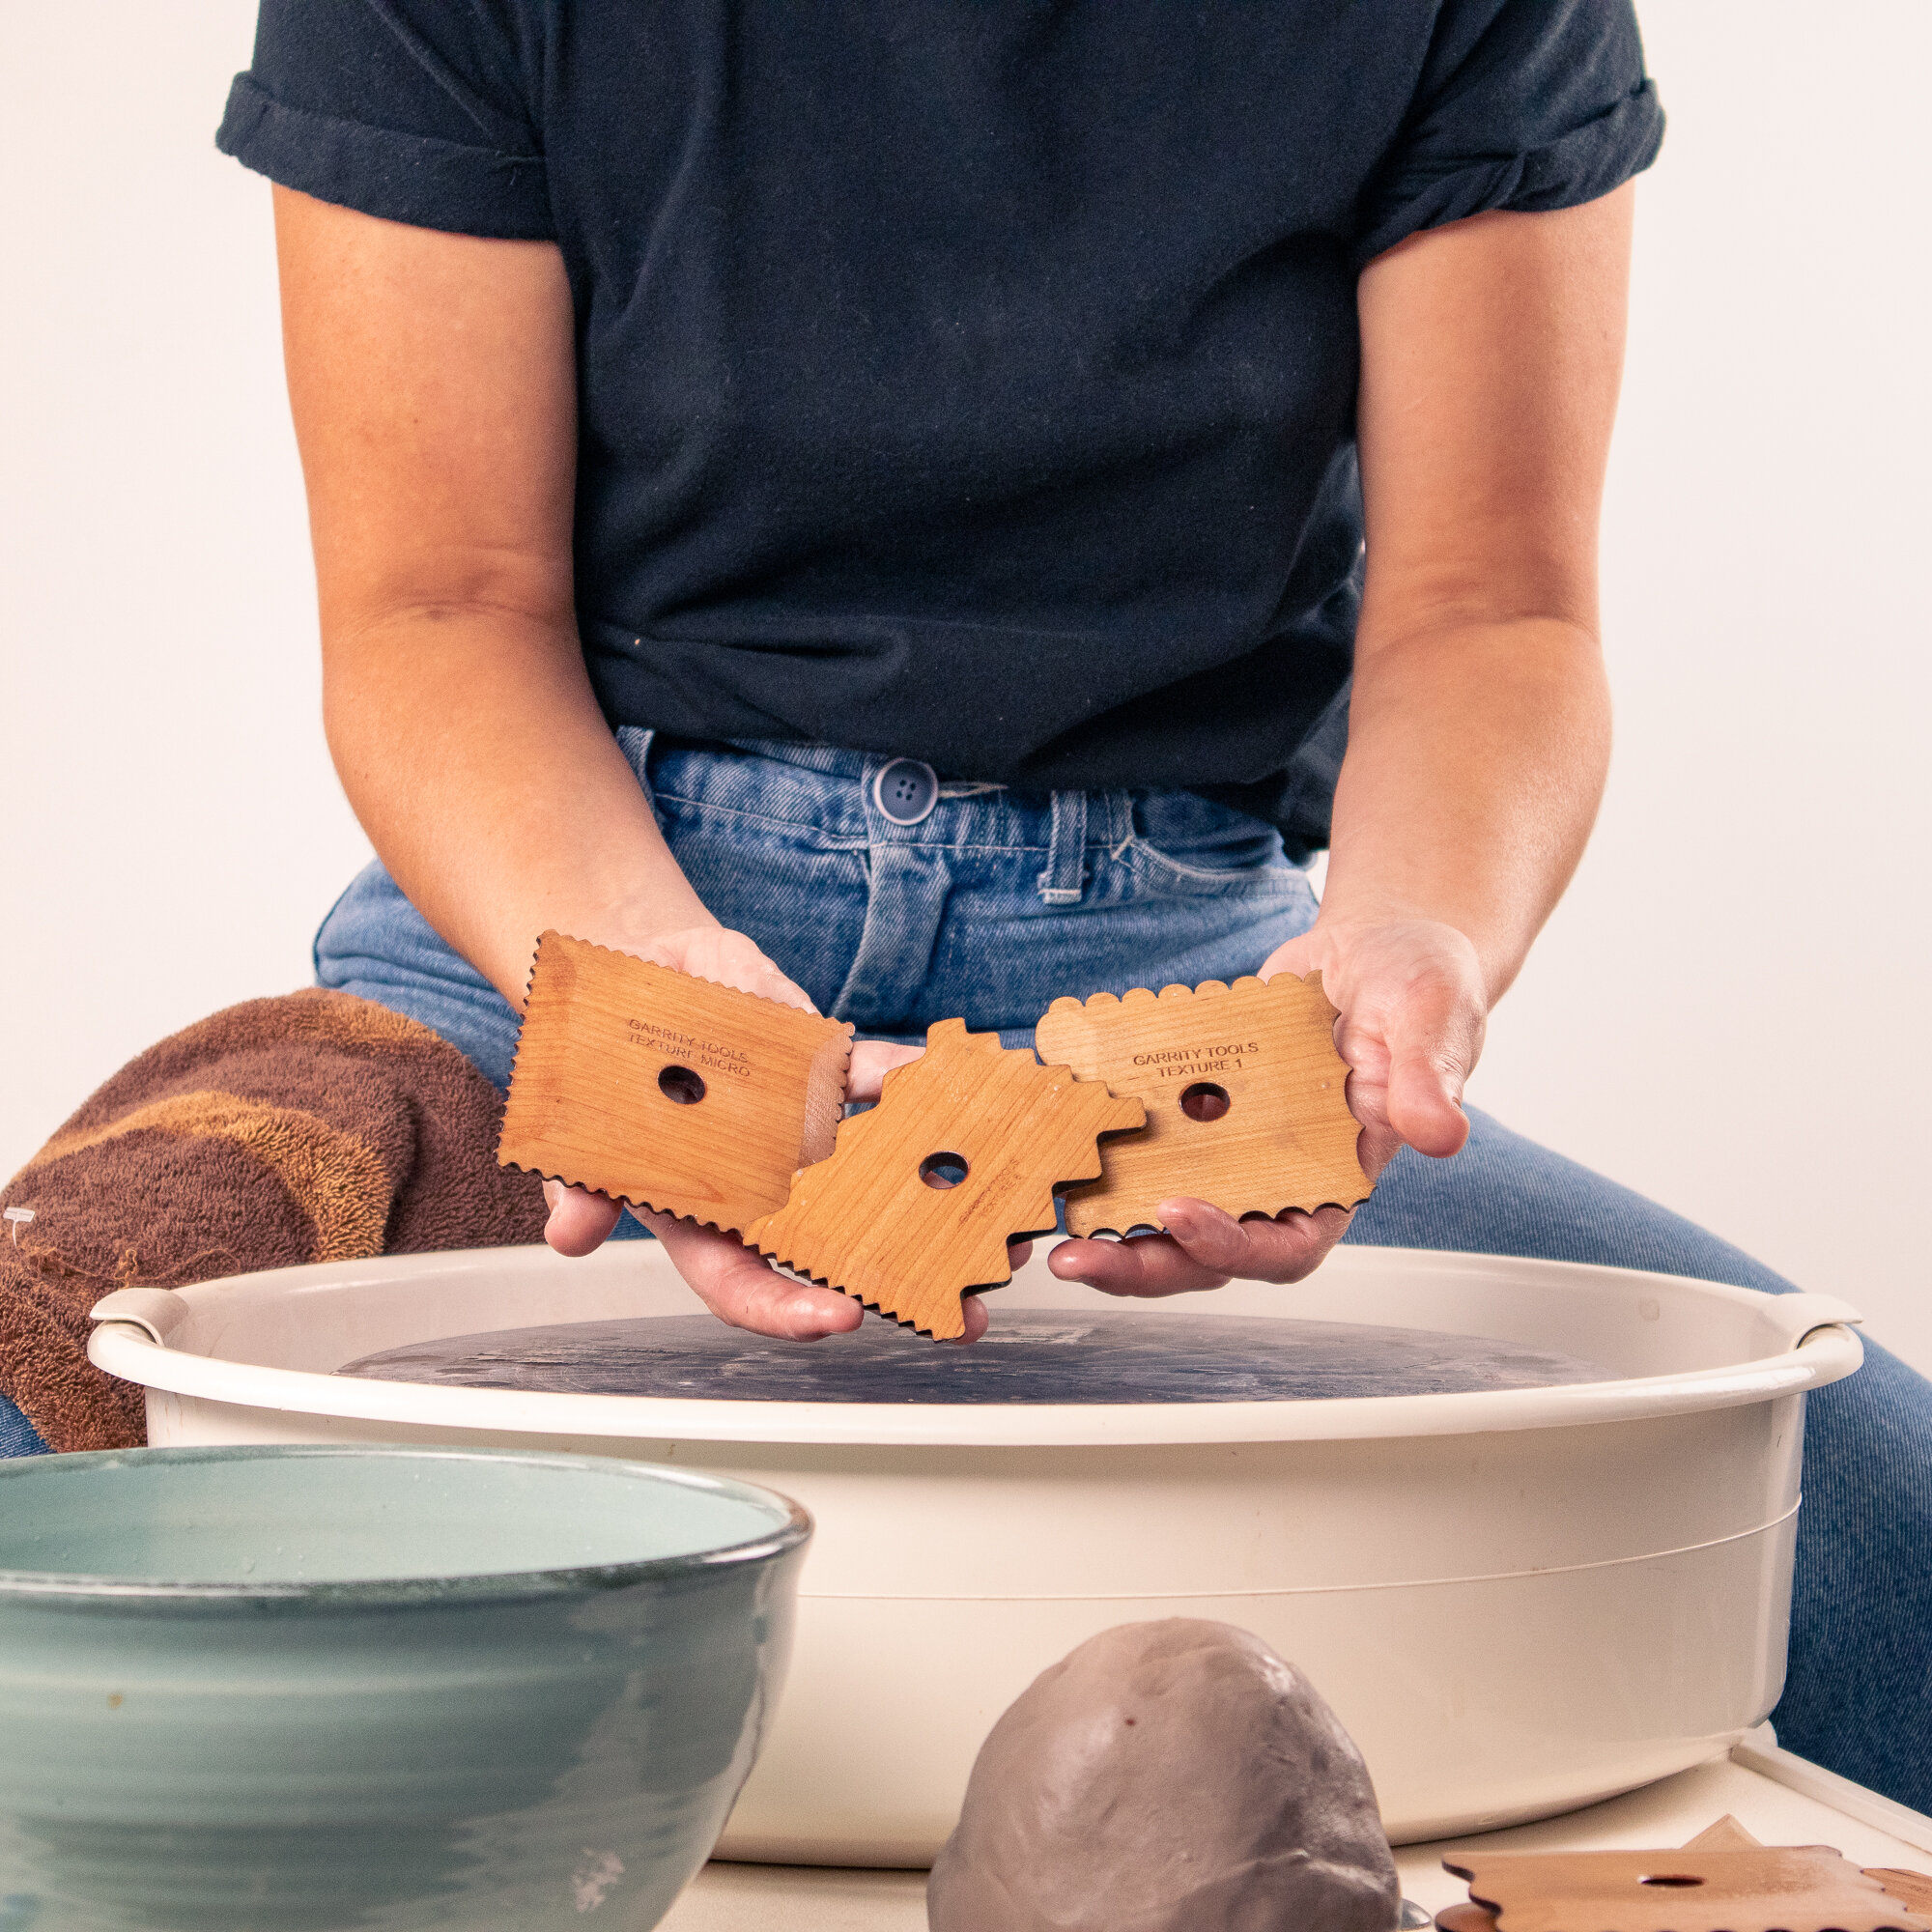
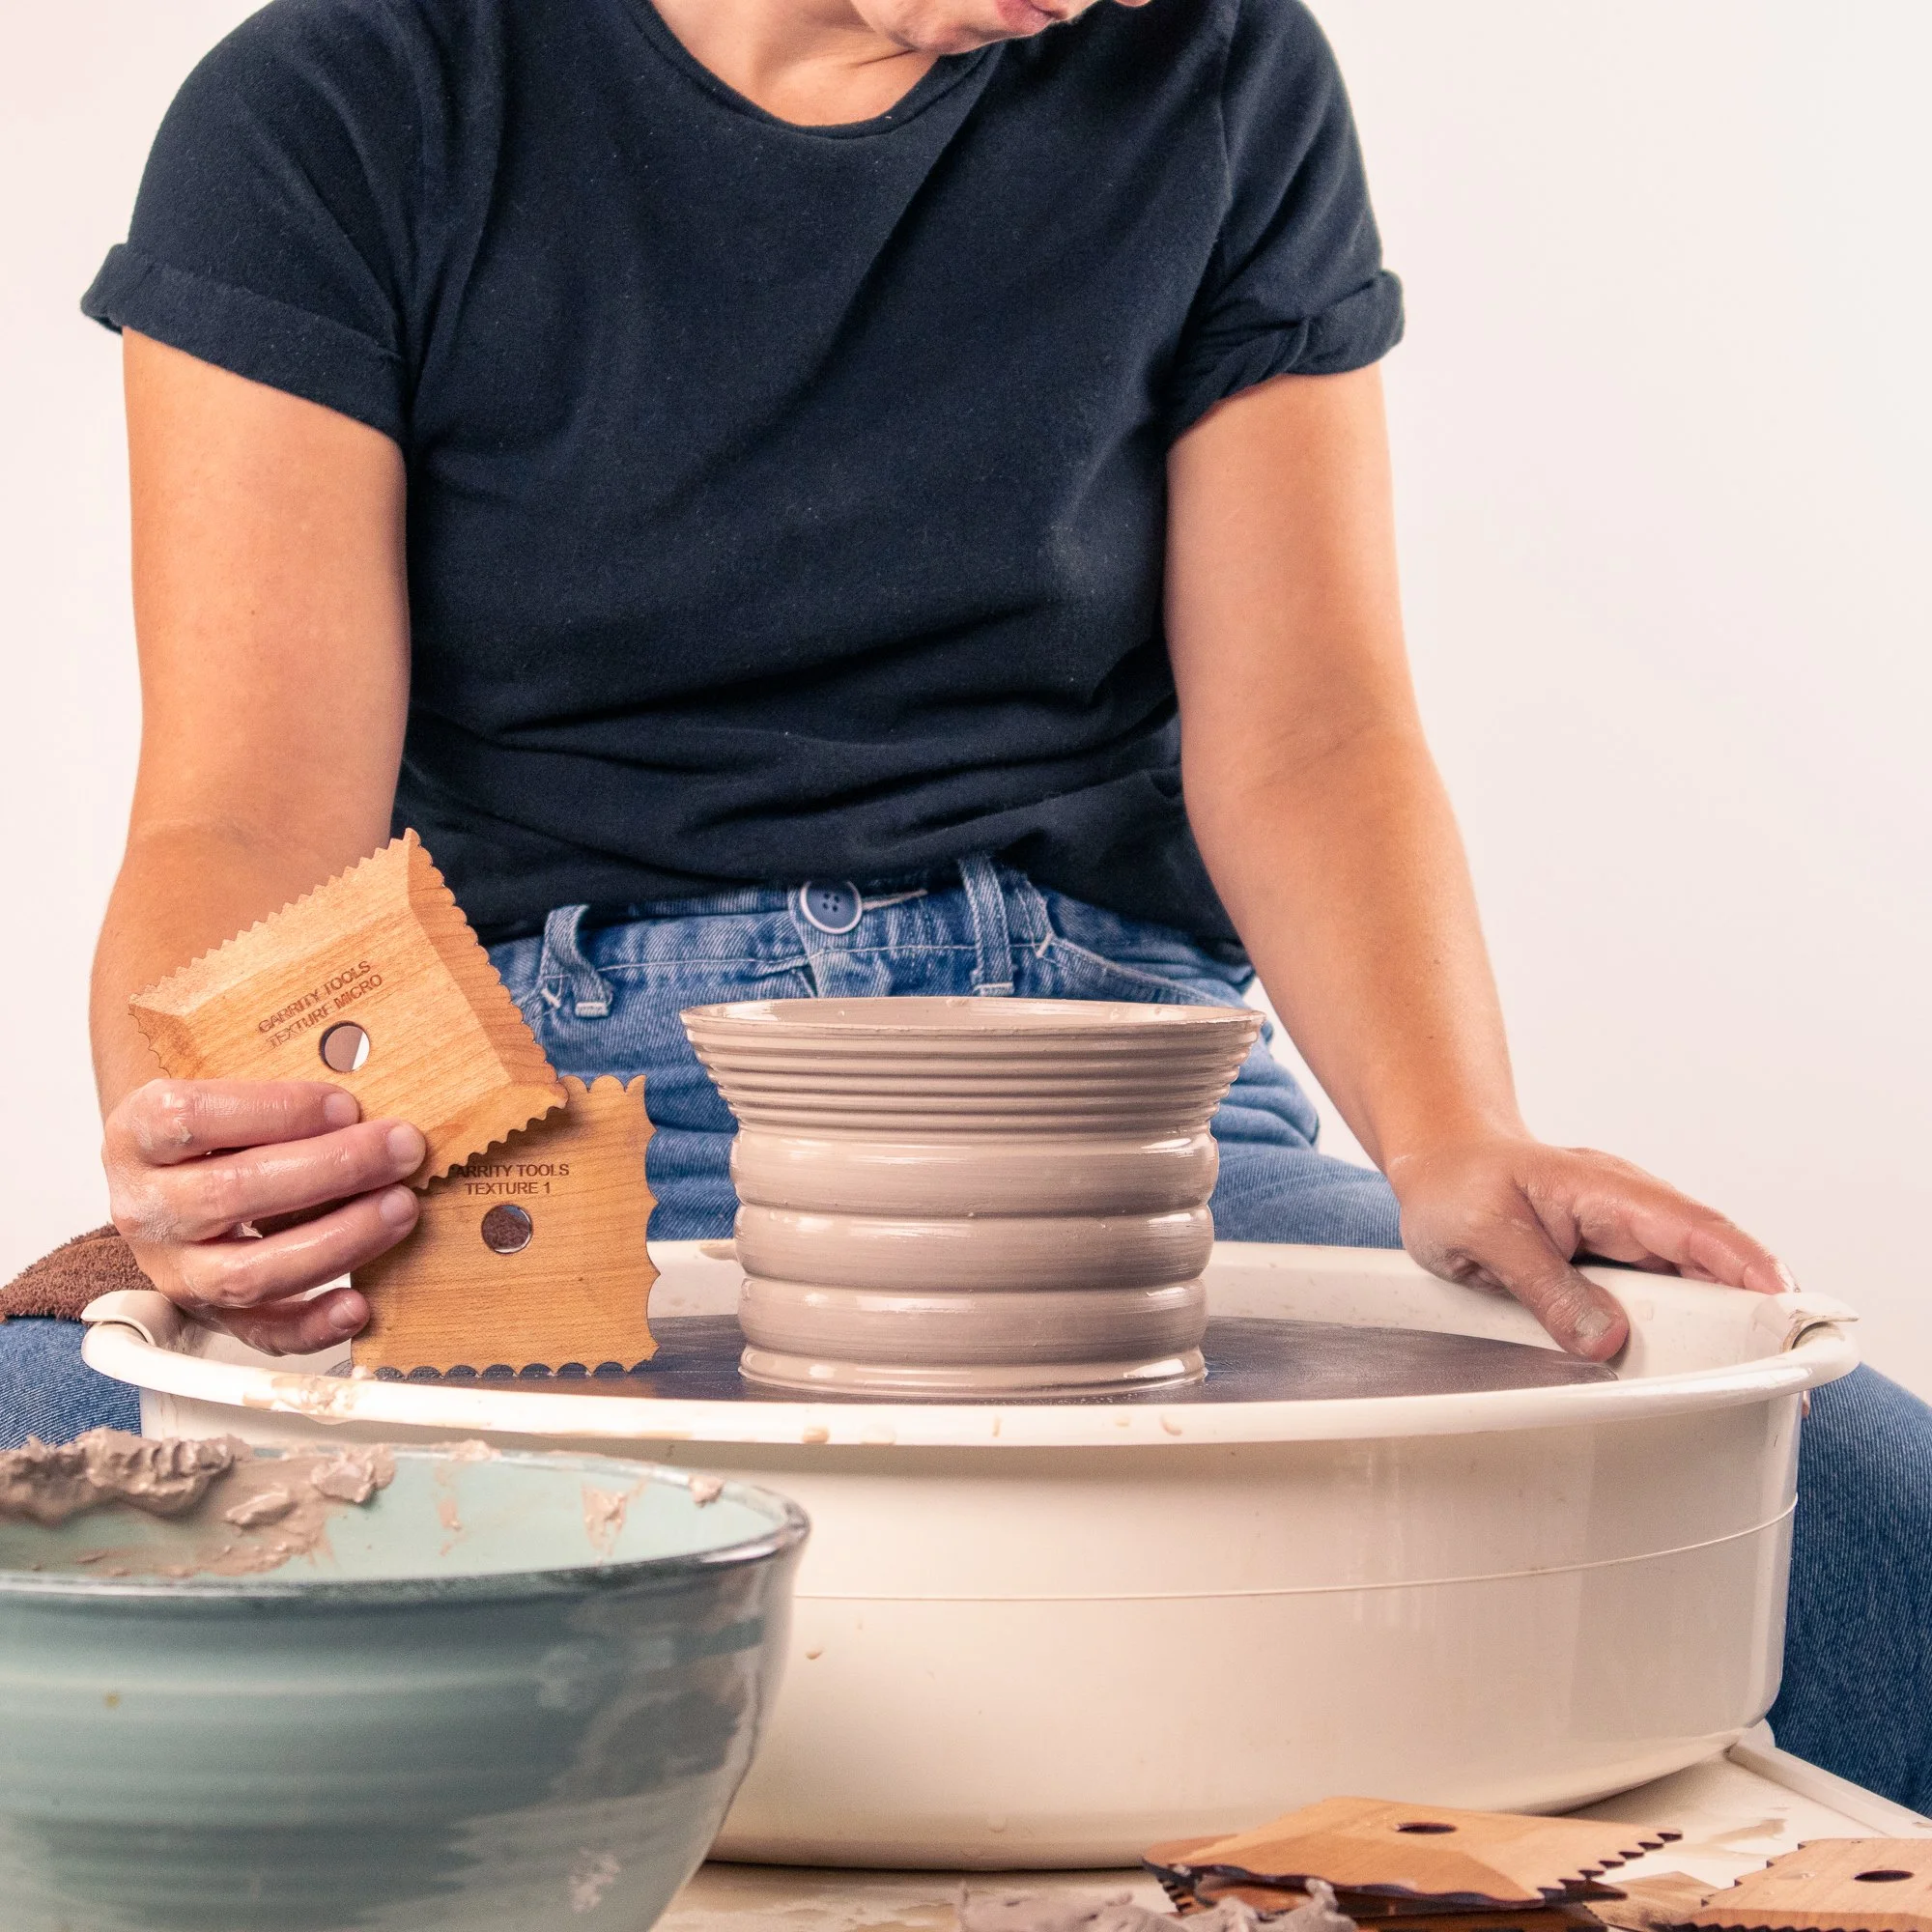
Our Texture Tools are some of our most unique and most popular ceramic tools we make at Garrity Tools!
We often get questions about how to use them when throwing on the wheel. While every potter has their own techniques and can find their own way to use our tools, below are a few tips for how we like to use these tools in our pottery studio:
You’ll need:
- Pottery wheel
- Wedged hunk of clay
- Bowl of water
- Texture Tools of your choosing
- Any other tools you use when throwing
Texture Tool Recommendations: Texture Micro is a great tool to start with because the texture is small and it acts more like a flat rib as you’re getting used to using these tools. Texture 1 and Texture 8 are great for learning as well!

step 1:
Make a cylinder.
You should work to create a cylinder that is roughly the size you would like your finished piece to end up. When you use the texture tool your piece will grow out and up slightly but not by much. You also want to make sure your walls are at least 1/4” thick and maybe closer to 1/2” thick as you first get started so you have a good amount of clay to push into the texture tool.

step 2:
Dip your tool in water and make sure your cylinder has a good coat of water on it too.
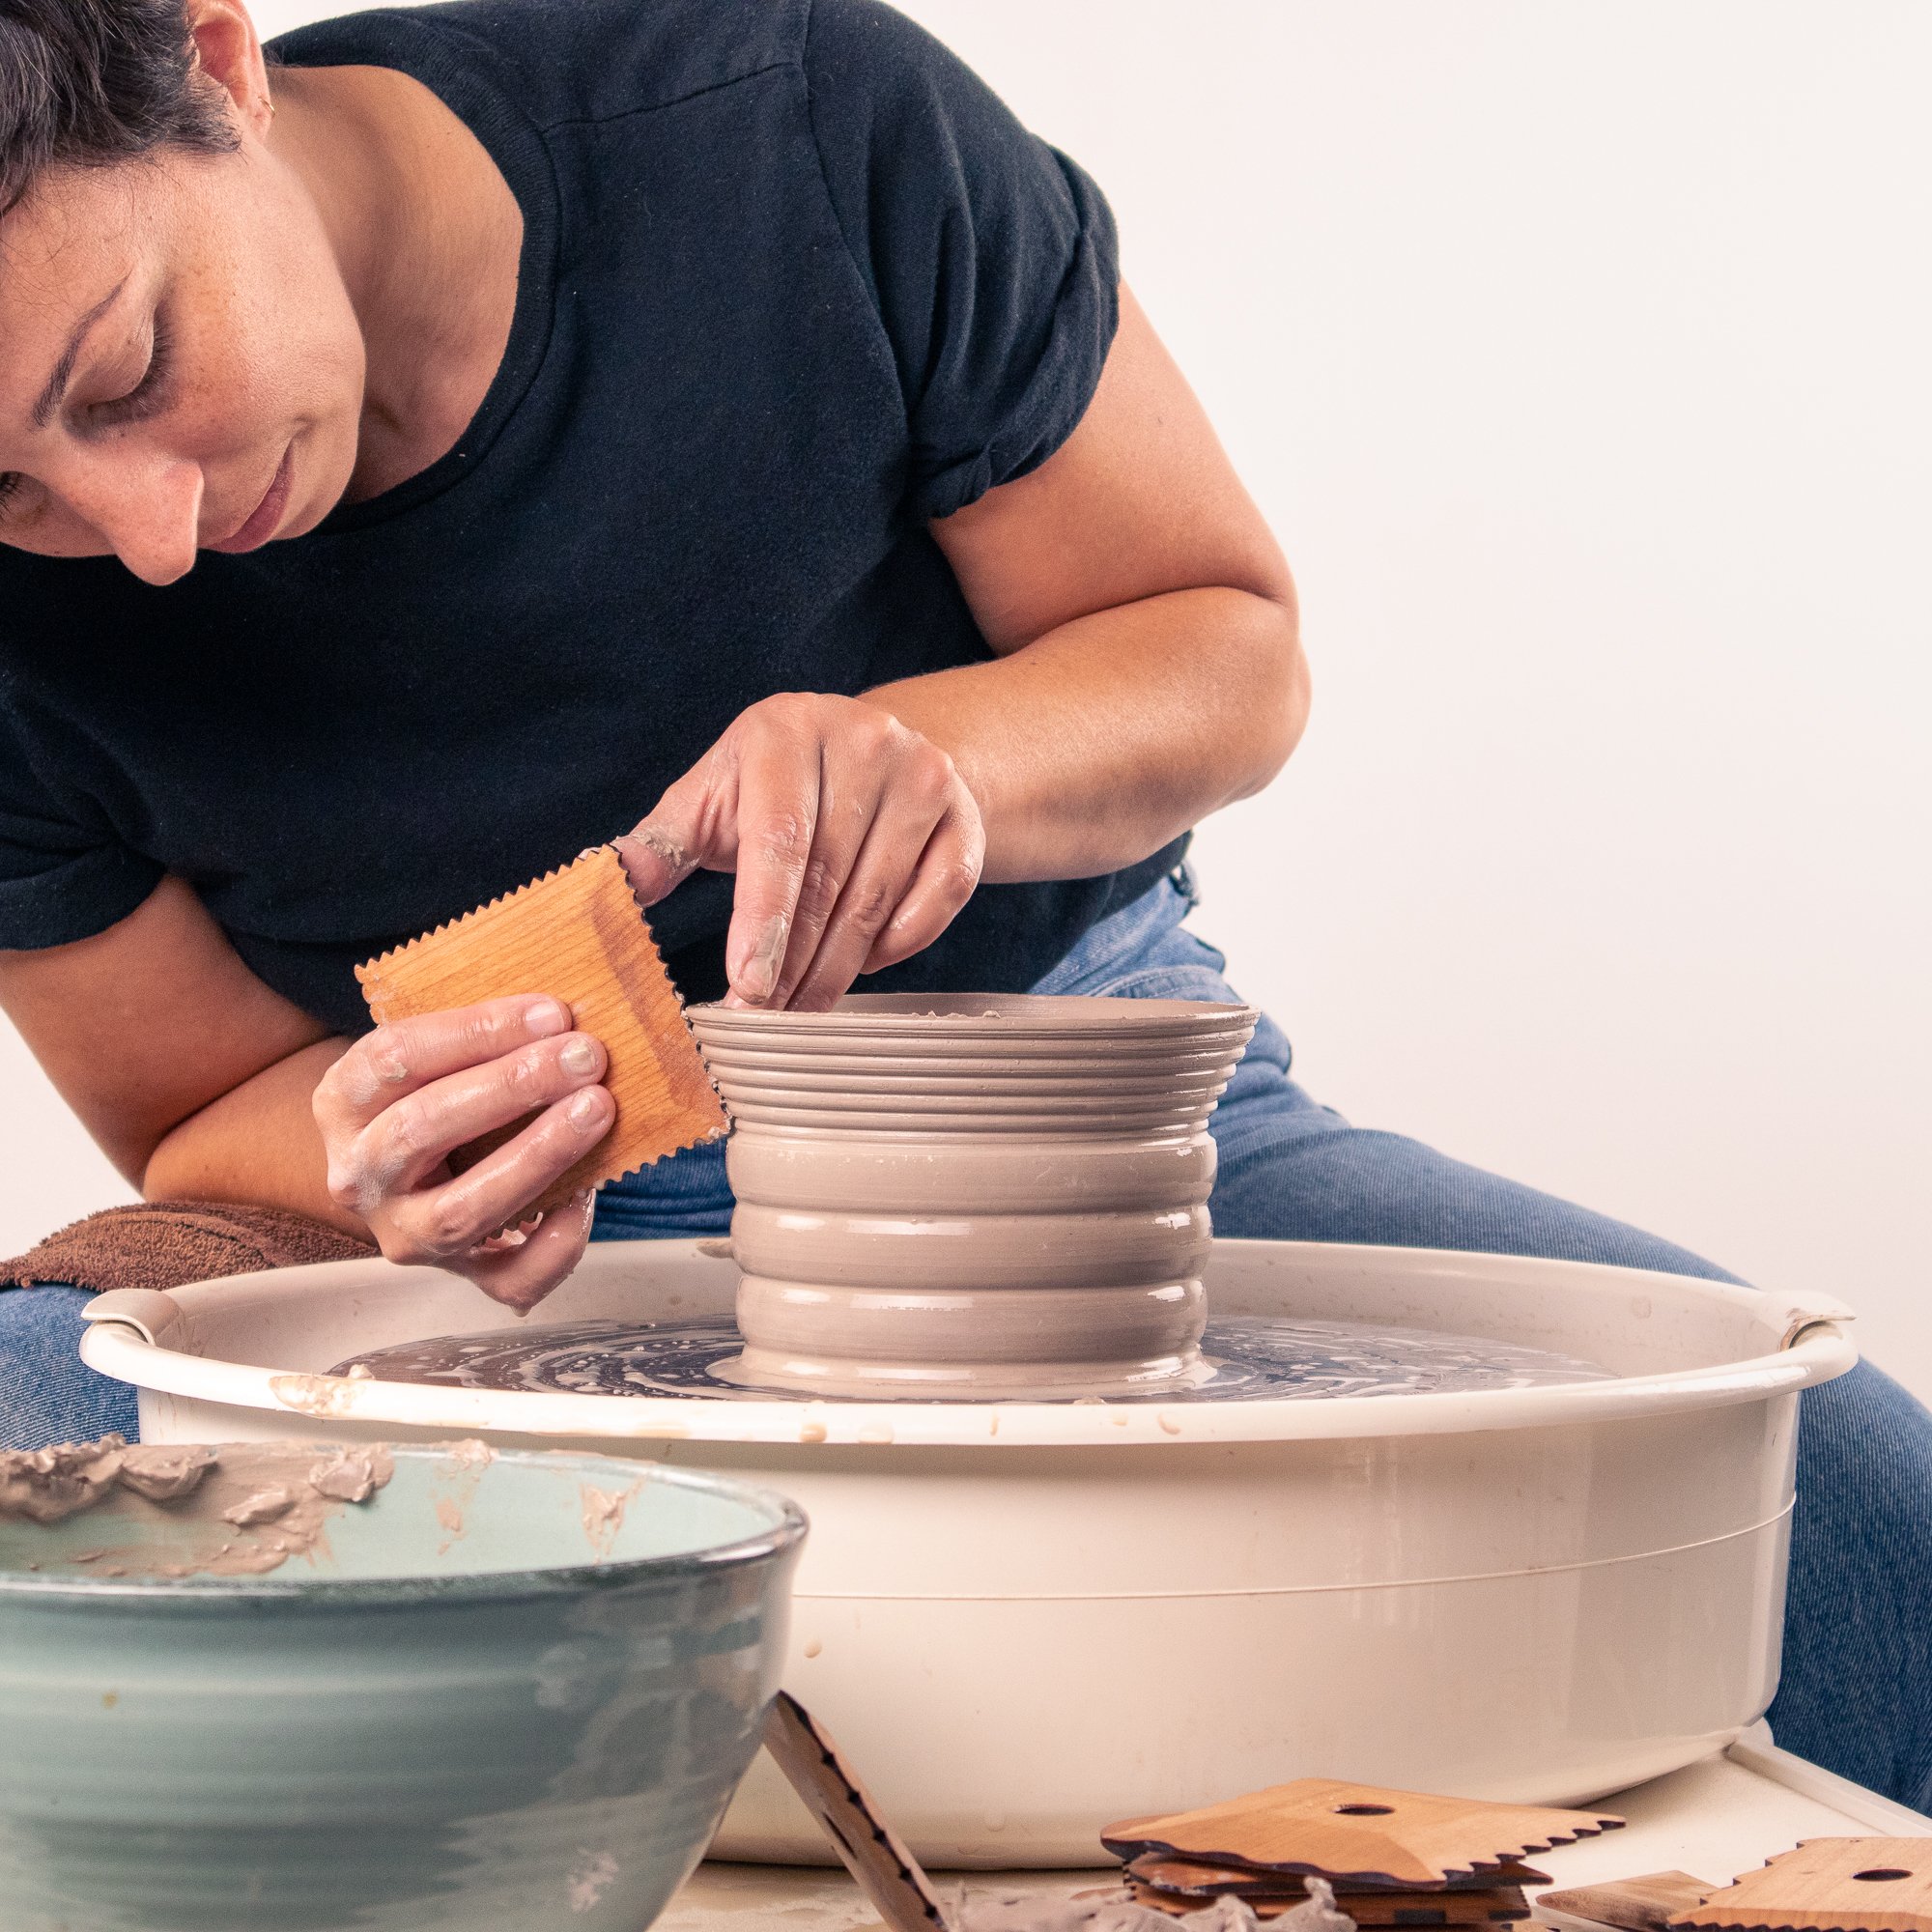
Position your texture tool so the side you want to shape the clay with is facing the exterior of your cylinder wall.
With the bottom of the tool pressed into the bat and your non-dominant hand inside your cylinder, bring the bottom corner of the tool to meet the base of your clay.

step 3:
Starting at the bottom, use your fingers to start gently pressing the wall of your cylinder into the texture tool.
We find that keeping the tool at a slight angle back towards you instead of meeting the cylinder at at 90 degree angle can help it run smoother.
Depending on the size of your piece, you can also use your thumb from your hand that is pulling the clay along the tool from inside the cylinder to help brace the tool on the outside — as you can see in this photo.

step 4:
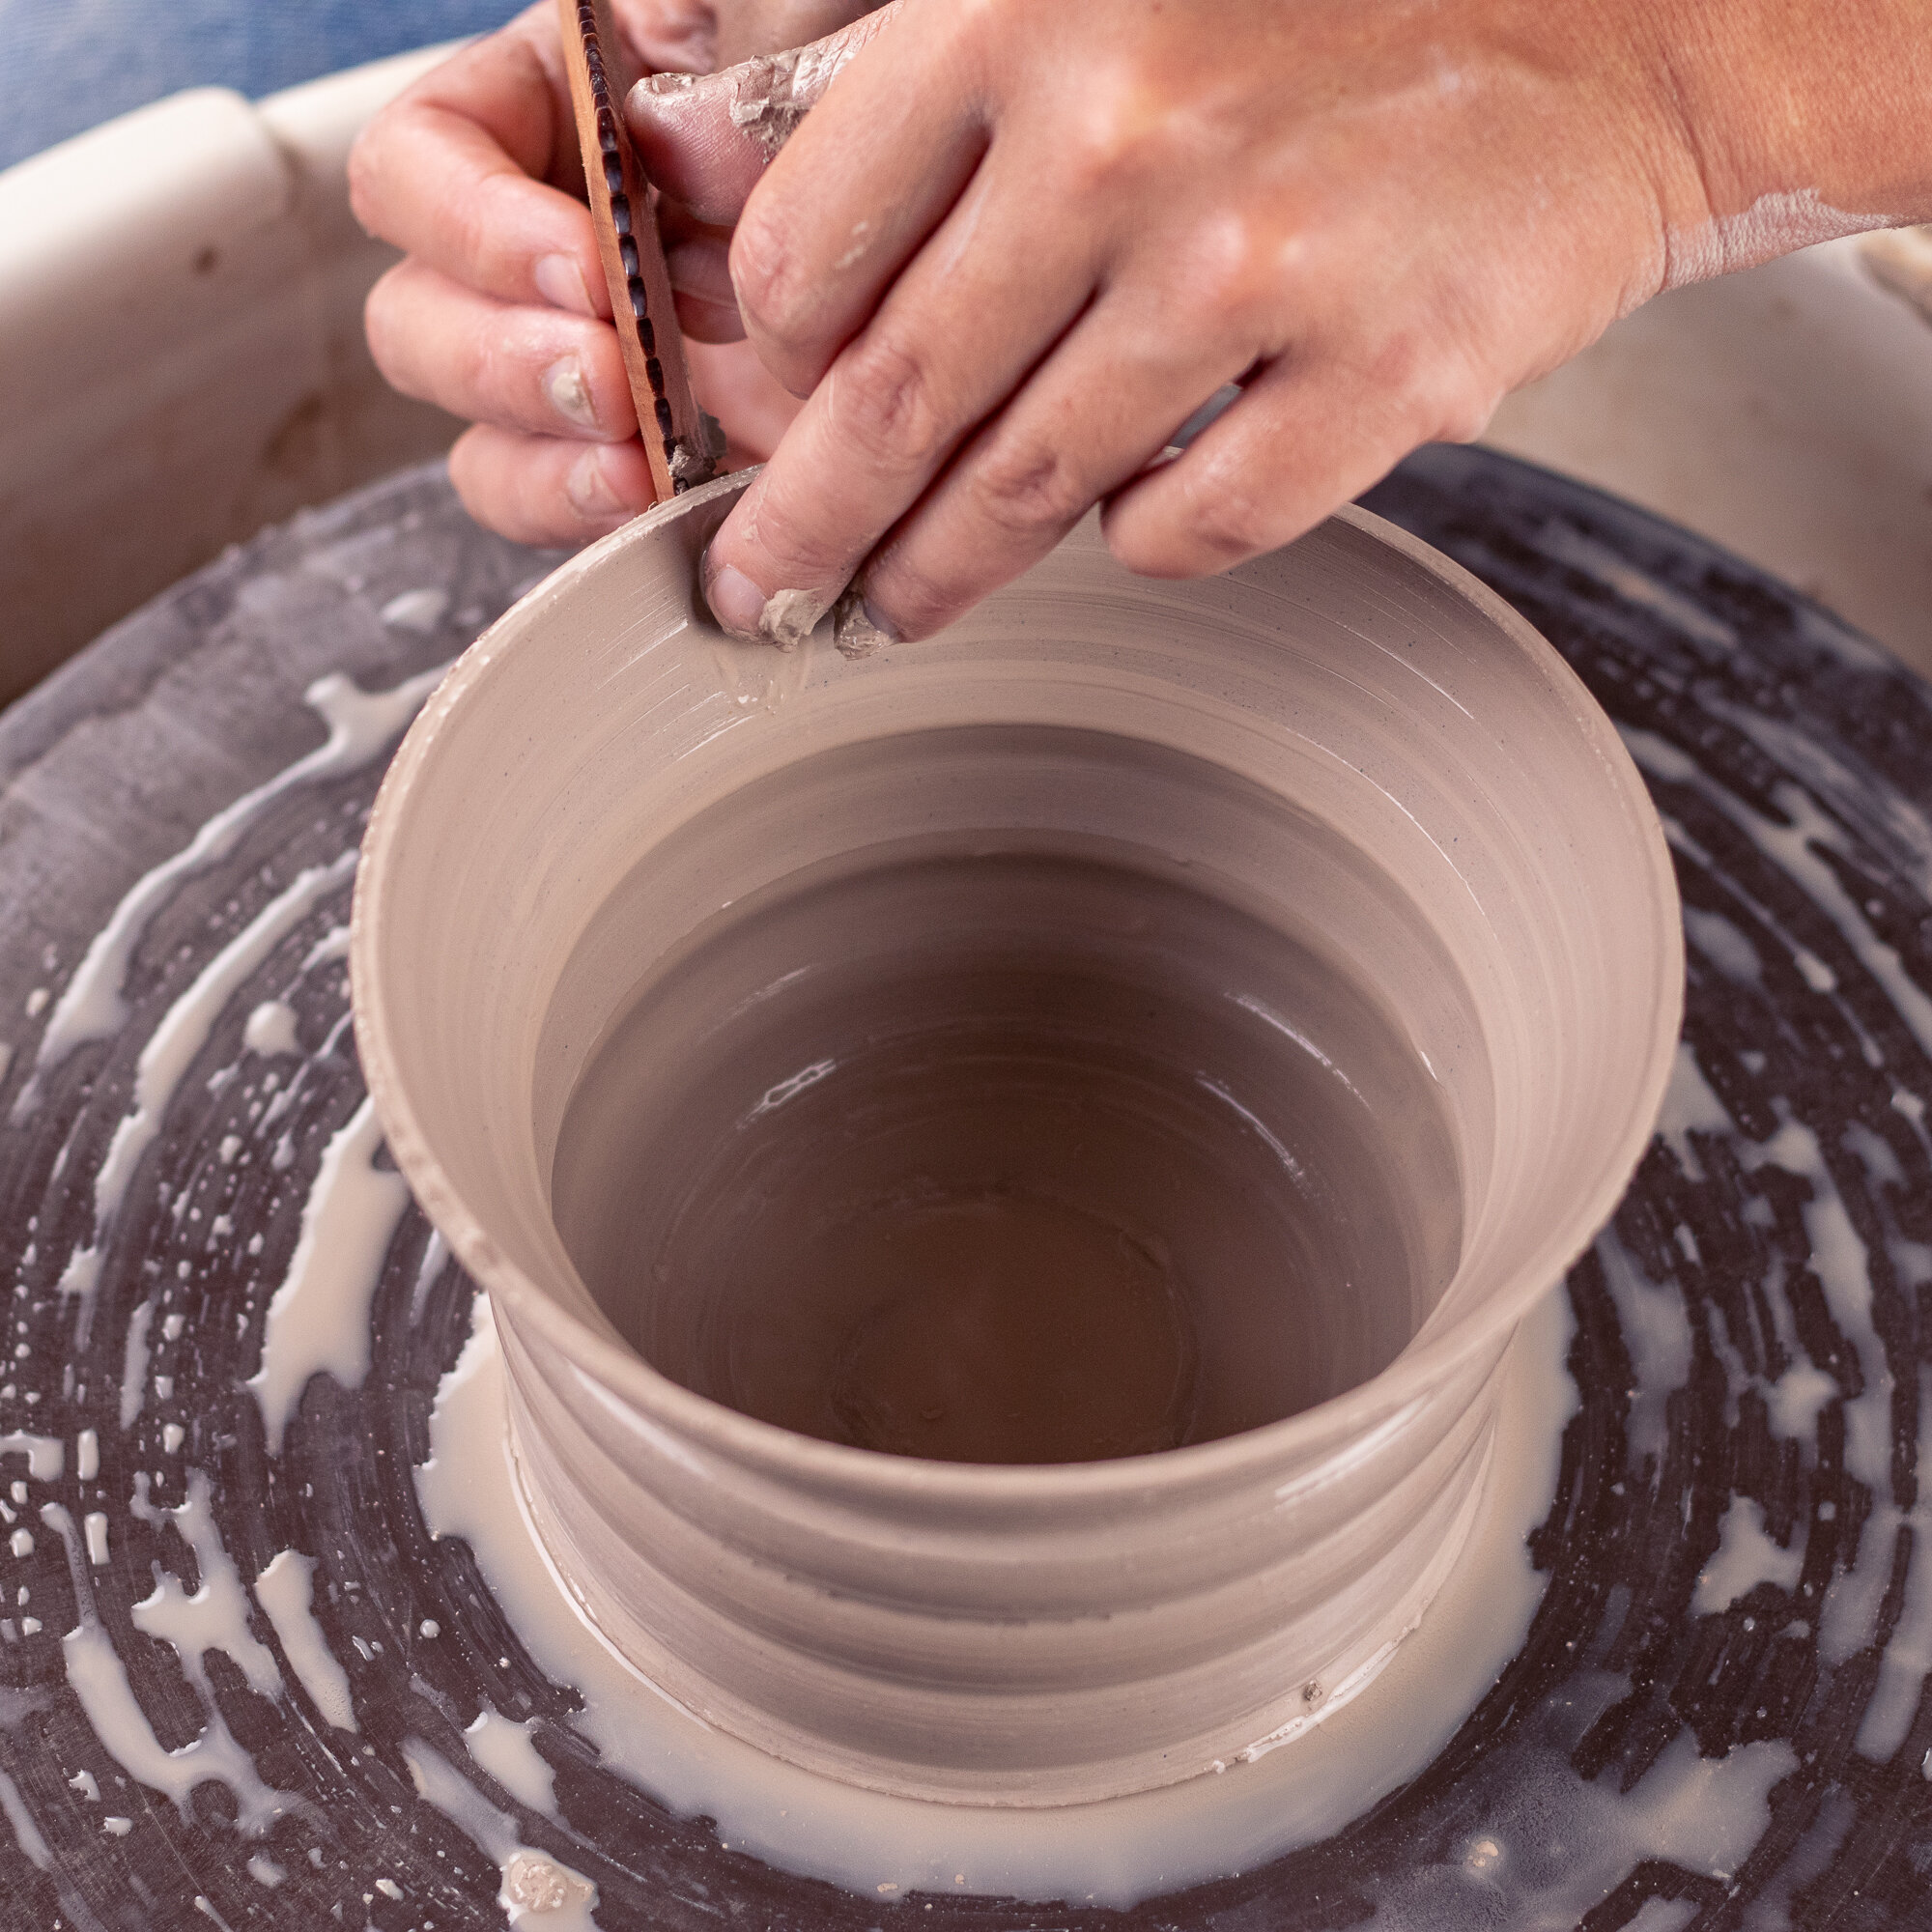
Continue running your finger up along the inside of your cylinder and gently pressing the clay into the tool. You are pulling the clay up and into the edge of this texture.
Once you get to the top of your cylinder, you should have the texture shape transferred. If it isn't exactly how you would like it or it looks rough, you can always gently pull the clay again to smooth it out and make the shape perfect.

a note:
Depending on how thick your walls are or what texture tool you are using, the interior of you vessel can also conform to the texture. This will leave ridges on the inside of your pot.

another note:
While you are pressing and pulling the clay upward along the texture tool to capture the shape, you will also remove a fair amount of clay from your cylinder. This is almost like “trimming” your pot into the Texture Tool shape. This is why it is important to start with thick walls.
step 5:
When first learning to use our Texture Tools, it is easiest and most steady to rest the tool on the bat and make a pull against the tool.
You can also use Texture Tools on different parts of your vessel, as shown here with Texture Micro.
This uses the same method but you must hold the tool very steady and in one spot on the exterior of your pot.
a note:
Using your thumb from your interior “pulling hand” to steady the tool on the exterior can help keep your tool in one spot. Bracing the arm that is holding the tool on the splash pan is also helpful!
texture complete:
Take time to practice with a few cylinders to get comfortable with your favorite Texture Tools. Once you’ve thrown with these tools a few times, it can be just as easy as puling your clay into shape with your fingers!